VP II GUI quick start
Last modified by Lev Andronov on 2025/03/09 12:52
The all-new Vision Point II features a reworked user interface. We recommend viewing this short instruction guide on the basic workflow for starting the image acquisition process.
Quick start stream view
Please note that each Open/Create action will open a corresponding panel, which can be easily managed with drag-and-dock functionality, allowing for a fully customizable workspace.
Check our VP II GUI video directory.
- Upon openning Vision Point II will list all of the detected PCI devices.
Open the frame grabber using right-click -> Open grabber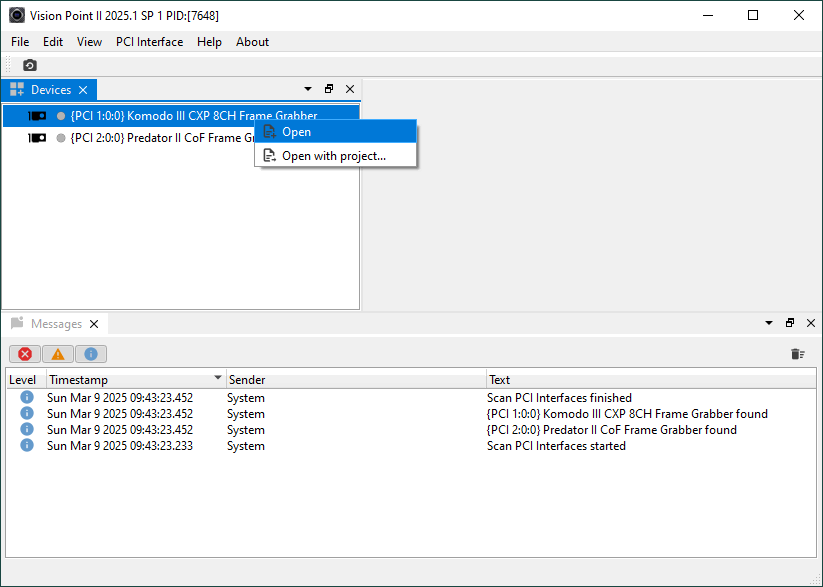
- To scan cameras right-click Scan devices at the opened frame grabber.

- To open a detected camera right-click Open on the desired camera.

- To start image acquisition process right-click Create stream on the opened camera.
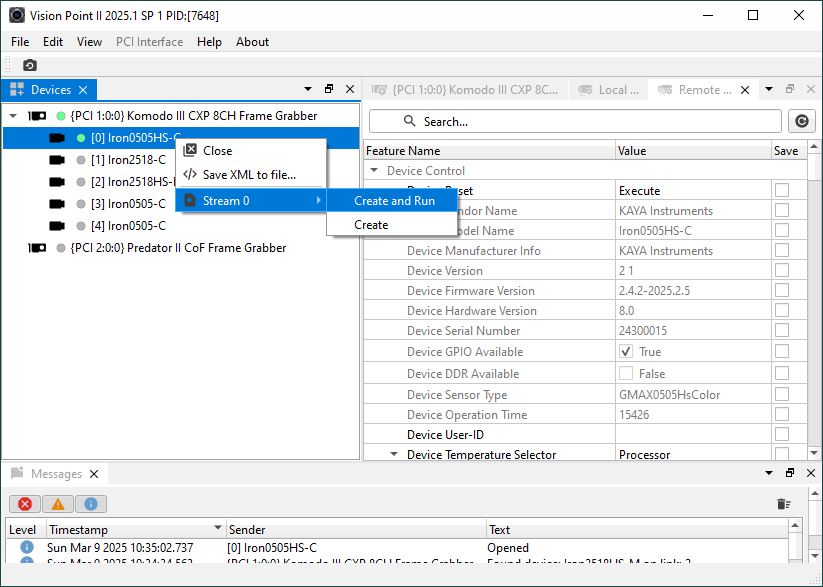
- Use "Features (Remote Device) - [link id] Camera name" window to change parameters on the camera side and "Features (Local Device) - [link id] Camera name" to adjust parameters on the frame grabber side.
GUI features
Inside application windows Drag-n-Dock
You can easily drag any dock any internal window to the borders of a main window. Also you can drag a dock internal window close the one of the four window borders, special drop overlays will be shown to indicate the drop area for auto-hide window.
Check our VP II GUI video directory.
